
How-to
Garden Stories
Photographing Orchids
Compared to photographing flowers outside, photographing in the Greenhouses is much more challenging and darker than you think.

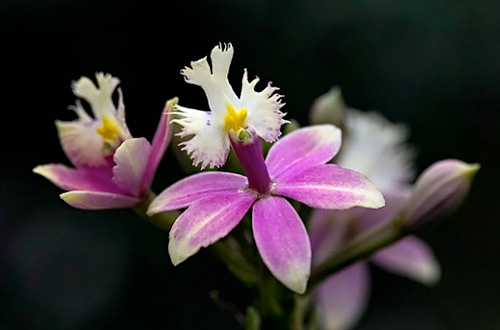
With a limited depth of field, I chose to focus on the "face" I saw in this orchid. Photo ©Carol Freeman
It may be bright outside, but the light in the Chicago Botanic Garden's Greenhouses is being filtered through glass and other plant material; be aware that it is even darker on overcast days. Most people are handholding cameras, so getting shots that are sharp requires some adjustments. Here are a few things you can try:
Use a shorter lens.
This is a bit of a compromise, as many of the orchids are up high or hard to reach. It would be nice to use a longer lens to get photographic access to more of the flowers in the Greenhouses. However, a shorter lens—100mm or less—is easier to handhold, and has a better chance of capturing sharp images at a slower shutter speed. (Typically, you want to have at least 1/400th of a second for a 400mm lens, or 1/100th of a second for a 100mm lens, etc., so the shorter lens will gain you two stops in this example—a significant benefit when taking handheld shots.)
Watch for what is in the background.
It is easy to be distracted by the beauty of the orchids and then get home and realize there are many unwanted elements in your photos. One easy option is to move in closer. When you get closer to the flower, you will get less background around the flower. Find flowers that are near the edge of an aisle—you will then be able to move your camera slightly up or down, or left to right, to get a pleasing background. Sometimes just an inch of movement can make all the difference.

Note the distracting window in the background. Photo ©Carol Freeman

By moving just a few inches to my left, I was able to get a more pleasing background for this orchid. Photo ©Carol Freeman
Increase your ISO.
Many newer cameras have improved sensors that let you increase the ISO and still get clean images with little noise. I like to do an ISO test before going out to shoot to see just how far I can push the ISO and still get images I find pleasing. It's best to do this before you are on-site, so you will be able to review the images on a large screen and know what will be acceptable to you on the day of your visit. Every camera is different, and what may work for me may be too grainy for you. Most cameras provide nice images in the 400 to 800 ISO range, and some can go much higher.
Use your flash.
I much prefer natural lighting, but in the Greenhouses on a cloudy day, there may be no other option for getting that shot of "the most beautiful orchid you have ever seen" that is hiding in the shadows.

When using my flash, I can add some extra depth of field. Here I was able to get most of the flower sharp. Photo ©Carol Freeman

Sometimes using a flash is the only way to get a shot. Here I found orchids that were away from other elements, limiting the distracting effects of the flash. Photo ©Carol Freeman

By moving closer, you can eliminate the distracting elements from your shot. Photo ©Carol Freeman
Increase your depth of field.
Orchids are tricky to photograph, even in ideal conditions. Many of them are deep flowers and require a large depth of field to get a pleasing amount of the flower in focus. Increasing the depth of field, however, comes with a price, as the increased depth will often allow much of the background to be in focus as well. And in the Greenhouses, you may not want what is in the background to be in focus, especially windows, people, or other parts of the building. Hand-in-hand with depth of field is plane of focus. Many orchids have very interesting centers, almost like faces. Be sure to get those features in focus to make the whole photo look sharper.
Have fun, experiment with different apertures, and get creative with composition! There is no right or wrong way to photograph these amazing flowers. They are here for your enjoyment and all that is needed is your appreciation.

