
Plants &
Gardening
Garden Stories
How to Grow More Amazing Dahlias Than Your Neighbors
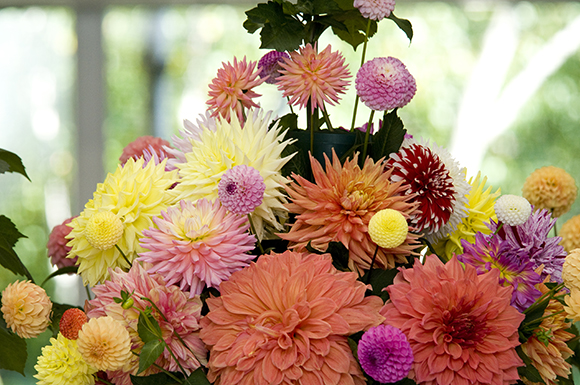
Dahlias are indigenous to Mexico, where they were grown by the Aztecs, who used the tubers as one of their staple foods. The plants were brought to Spain and eventually spread throughout Europe, as people appreciated the beauty of the flowers themselves. Through hybridization, there now are more than 70,000 varieties of dahlia, about 1,500 of which are popularly grown.
Here are some tips for growing these beautiful plants in the garden.

Selecting a site
Pick a sunny spot where, optimally, the plants will receive at least six hours of sunlight. Since dahlias do not like to get their “feet” wet, the area should not accumulate water and should drain well. If the soil is clay-like, it should be amended with leaf mulch, compost, or peat moss. Since dahlias should be planted about 18 inches apart, it is easy to determine the number of plants the area will accommodate.
Planting
You can plant your dahlias as soon as the danger of frost has passed, and the soil temperature remains above 55 degrees Fahrenheit. In Chicago, this typically means about the middle of May. However, some growers wait until Memorial Day just to be sure. The delay does not seem to appreciably affect when the first blooms appear. You can start with either potted plants or tubers that have been overwintered from last year’s crop.
If you are using potted plants that have already developed a root system, place the plants in the ground so that the top of the potting medium is level with the ground. Many growers add a slow-release fertilizer (e.g., Osmocote) and/or composted manure to the bottom of the hole. Water the plants once they have been put in the ground, and water as needed to keep the soil moist (about 1 inch per week).

Planted dahlia tuber

A new dahlia plant
When starting with tubers, dig a shallow hole (about 6 inches deep), add material as described above, and place the tuber on its side. Loosely cover the tuber—but do not bury it—with soil. Once the tuber has sprouted and the sprout has reached the level of the soil, the hole should be back-filled. The tubers should not be watered until they have sent out a sprout that reaches above ground level. A word of caution: Tuber sprouts can be quite delicate. It is a good idea to use a short, temporary support until the plant becomes established. You can start with tubers planted directly in the soil or start the tubers indoors in pots to get an early start. If starting inside, the tender plants should be hardened off prior to planting in the garden.
Since dahlias will often grow to 5 feet or more in height, they need to be staked. The stake should be placed in the ground as soon as the plant, or tuber, is in place. Put the supporting stake within a couple of inches of the plant and avoid damaging the tuber. Plastic stakes tend to bend and break. Many growers use ¼- to ½-inch rebar that can be bought from big-box stores or building supply centers. Tomato cages also provide good support.

New dahlia plant staked, tied, and identified
Depending on the height of the plant, you should loosely tie it to the supporting stake. The final step in the planting process is to write the name of the variety on a plastic tag. The tag should be stuck in the ground or attached to the support system.

Dahlia bed ready for the growing season
The first several weeks
As the plant continues to grow, additional ties will have to be placed at about 12-inch intervals. After the plant produces three or four sets of leaves and is about 18 inches tall, the plant should be “topped.” This means that the terminal bud, at the top of the main stem, must be removed. This will be done only once. This process forces that plant to develop lateral stems, which results in more flowers.

A “topped” dahlia with terminal bud removed, and laterals forming
Water as needed to keep the soil moist. During this early phase, many growers use a nitrogen fertilizer to promote leaf growth and stimulate the plant’s development.
Once buds appear
Depending on the weather and maturity of the starting stock, after about six to eight weeks, the first buds should appear. These will develop in groups of three. Two of these should be removed. This process, called “disbudding,” will result in larger blooms. The first blooms tend to be the largest ones that the plant will produce. Growers who plan to compete in shows will try to time these first blooms so they appear just before the show.

A dahlia plant ready for “disbudding”
During this phase, water the plant as needed. Watering should be done at the base of the plant. Water on the leaves may cause disease, and water on the blooms may cause them to become top-heavy and droop, or even break. Fertilizing during this phase should consist of potassium and phosphorus to encourage root and bloom development. Do not over-feed the dahlias. Fertilizing about every three to four weeks is the generally recommended practice.
If the plant becomes too full, you should remove a lateral stem or two. This process, called “disbranching,” should be done as close to the main stem as is possible. All plant grooming should be done in the early morning. Ideally, you should sterilize the cutting tool as you move between plants to avoid the possible transfer of any disease from one plant to the next.
During the growing season, be aware of the effects of pests and plant disease. Snails and slugs may attack the newly planted dahlias. Spider mites are the most common pest. If they attack, the leaves will shrivel and yellow spots will appear. Many growers preventatively spray once the hot weather arrives to avoid these pests, as remediation is difficult.
Cutting the blooms
It is best to cut the blooms in the morning, using a sharp instrument to make a clean cut. The stem can then be slit along its length to increase water absorption. Freshly cut dahlias will last in the house for one week or longer.

